AAC Cruiserweight M2 (Savage)
Game8 has gone with the “new FFO” strat, which is essentially Lucrezia’s strategy combined with Woops’ method to resolve the adds.
N.B: Game8 updated the Magma positions to pair one ranged DPS with one healer on each island instead of having both healers on the same island. The macros below reflect this change.
English
■ Sticky Mousse | ■ Color Clash ※ Face mid
D3 D4 | ◎ 2:2:2:2
H1 ☆ H2 | H1D3 MTD1 STD2
D1 D2 | H2D4
※ Use True North | ◎ 4:4
※ Tanks under boss | MTH1D1D3 STH2D2D4
■ Desert phase ーーーーーーーーーーーーーーーー
【Dodge cacti】| 【Quicksand】(True North)
Party | H1→NW Party→NE
Tank DPS | (spare) H2→SE
※ Dodge cacti N | ※ If your corner has AoE→SW
【Bomb drops】※ Face Quicksand
← H1/D3 MT/D1 ST/D2 H2/D4 →
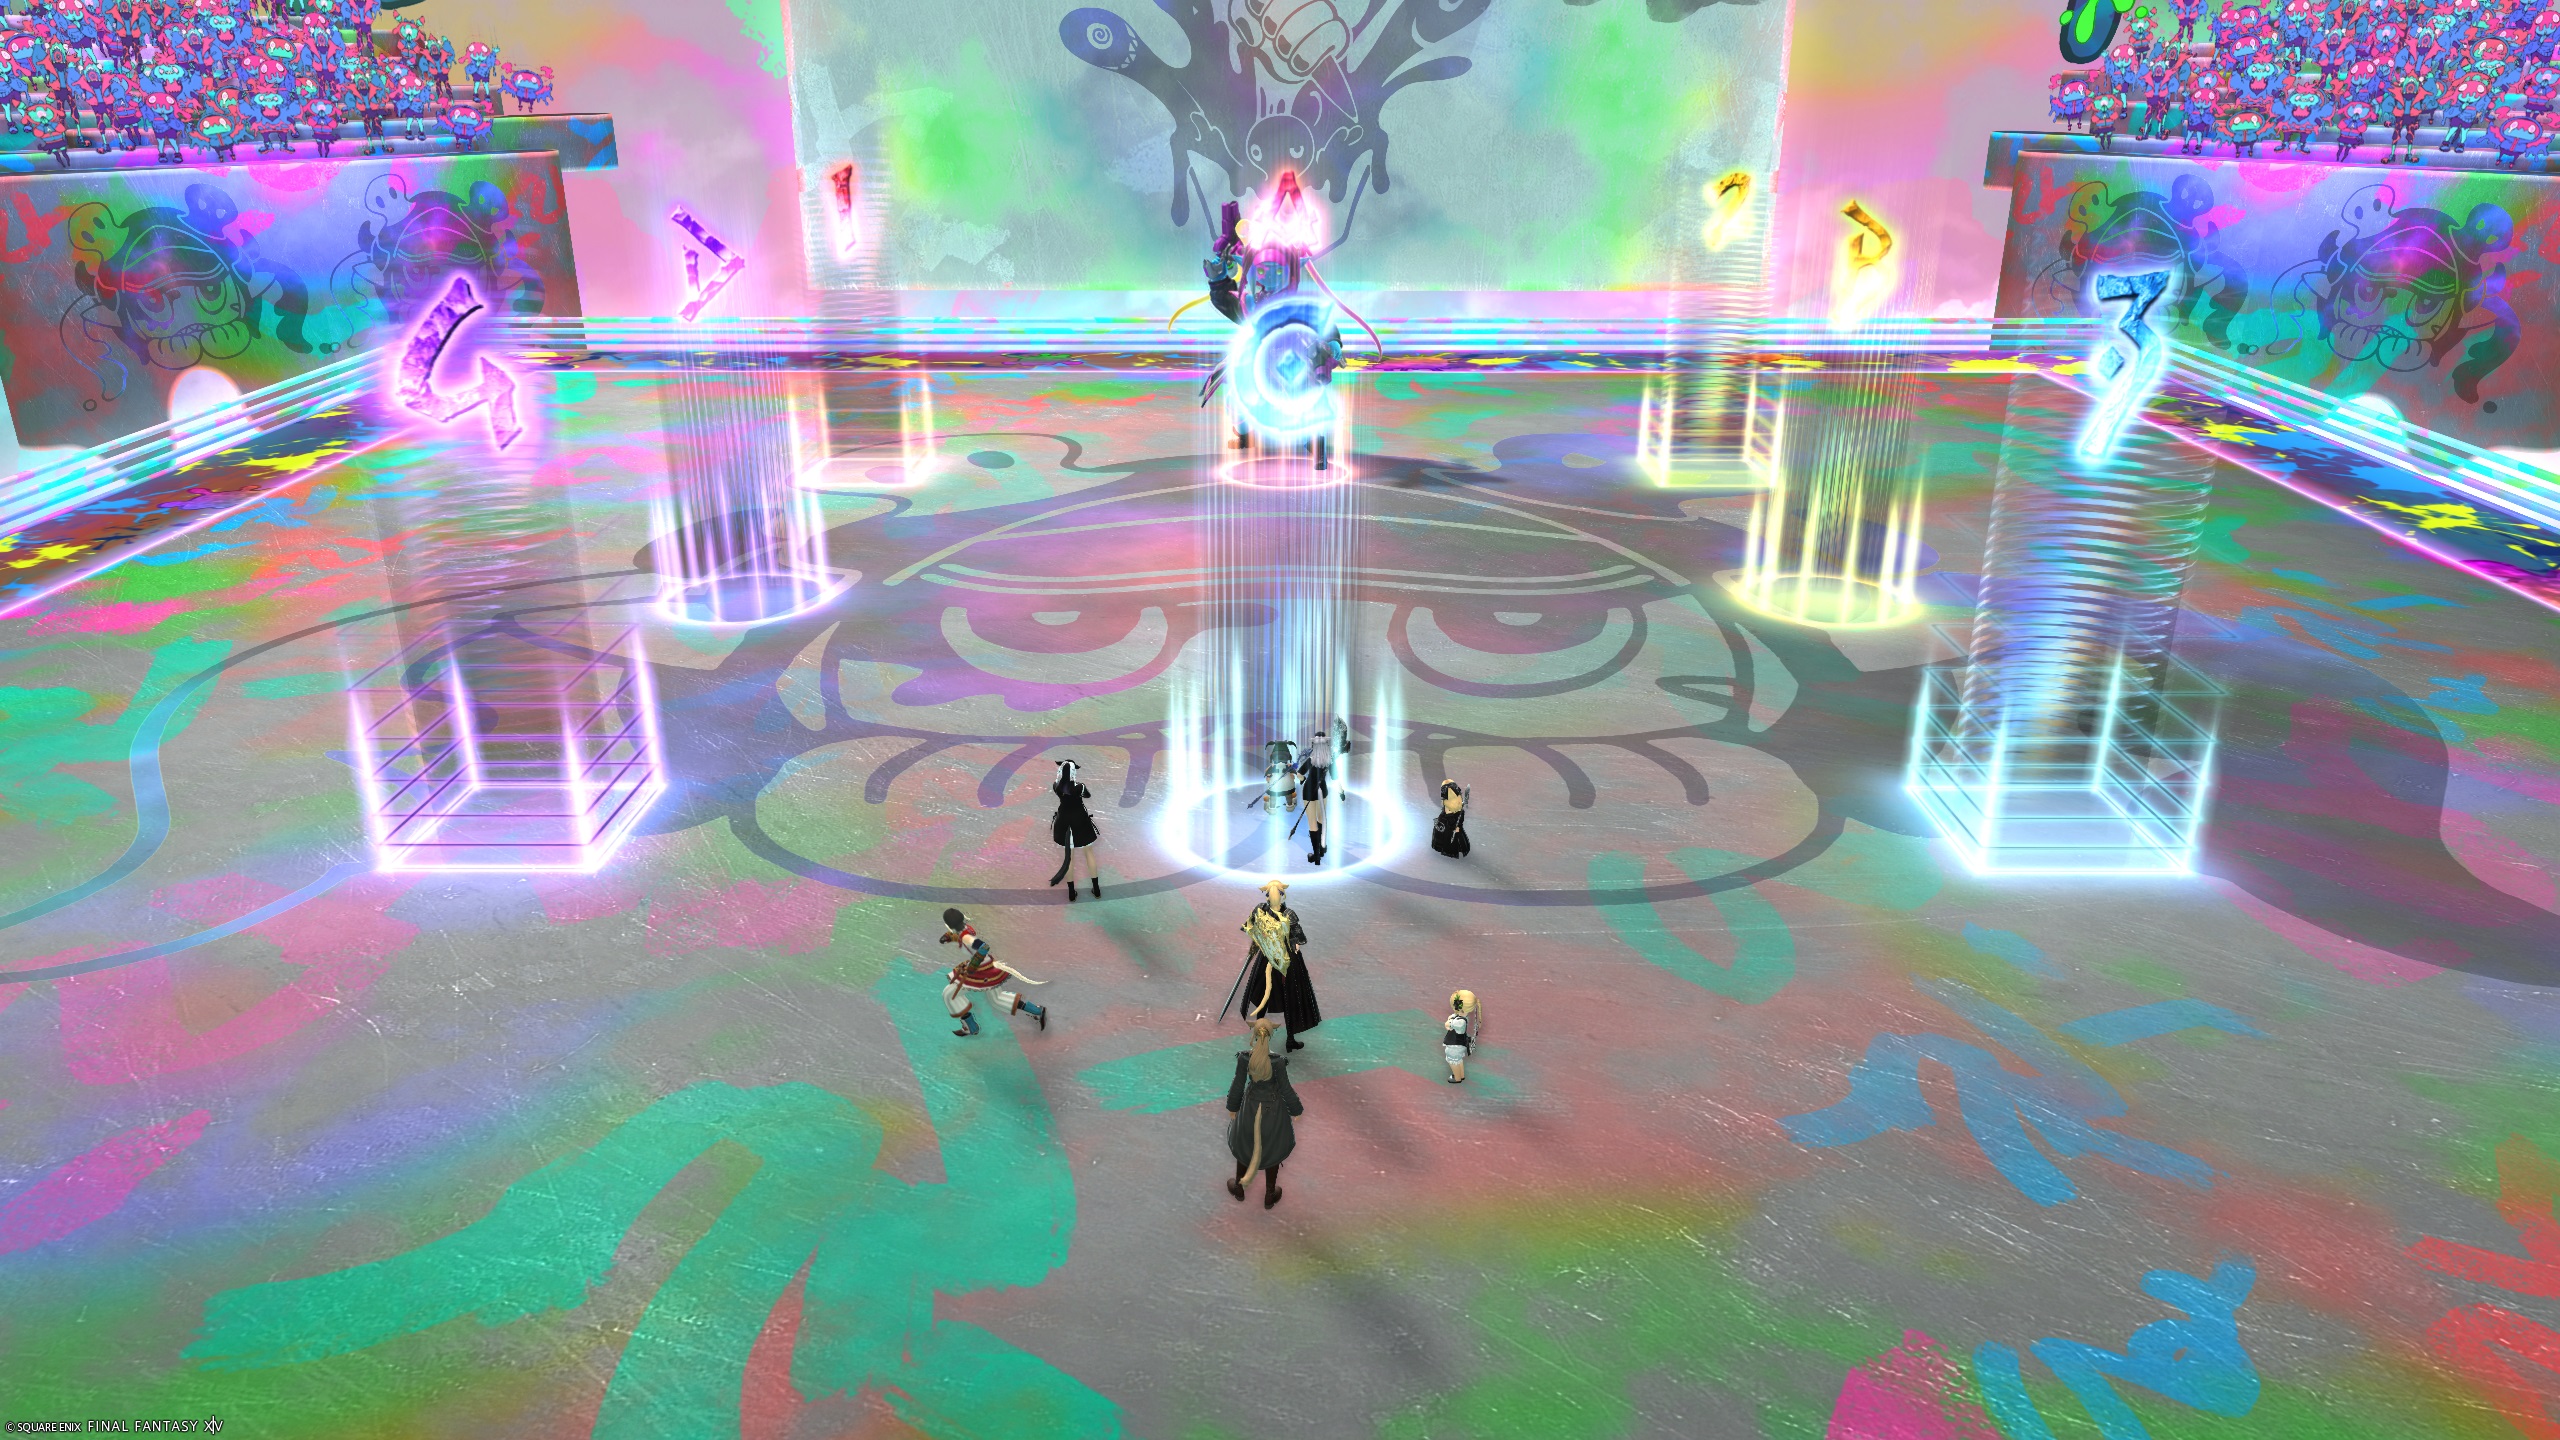
■ Adds phase (Jabber > Cat > Ray > Mu > Yan) ー
【1】 MT → Mu (SE)
STD1D2 → Yan (W)
H1H2D3D4 → Cat (Gather at W Yan)
【2】 MT → Mu (S, bring to NE Ray)
H2 → Ray (NE)
D3 → Ray (NW) ※ Puddles N→S
【3】 MT → Jabberwock + Mu (W)
ST → Yan (N, bring NE)
Bound Healer → SE ※ Stun:MT>D1>D2
【4】 MT → Mu (S, bring to SE→SW Ray)
ST → Jabberwock + Yan (N)
Bound Healer → S
D3 → SW Ray ※ Puddles S→N
D4 → SE Ray ※ Stun:ST>D1>D2
■ River phase ーーーーー■ Magma phase ーーー
【Fire stacks】 | H1D3 (N) H2D4
Near: MTH1D1D2 | ※※※※※※※※※※
Far: STH2D3D4 | MT ST
【Lightning spread】 | D1 D2
D3 MT D4 | ※ Healers bait stacks
H1 H2 |【Towers #2】(Face mid)
D1 ST D2 | ◎ 4/2/2: Rotate CW/CCW
【Thundercloud】 | so melee have 4 towers
←T/H Party DPS→ | ← D1MTSTD2 →
(Use cloud as North) | ← D3H1 →
| ← D4H2 →
| ◎ 8/0/0:
| H2 D3 D4
| H1 D1 MT ST D2
Japanese
■基本散開:ねばねば(北基準、Tボス下)■カラークラッシュ(2:2:2:2)
  D3 D4    |        ボス
H1 ☆ H2 |  H1D3 MTD1 STD2
  D1 D2    |      H2D4 4:4は←MT組ST組→
■砂漠フェーズ
▼サボテン避け(北)    ▼サボテン+流砂(北基準)
   6人     | 北西H1 北東6人
 T      D  | 予備    南東H2
■爆弾捨て(流砂北)
H1/D3 MT/D1 ST/D2 H2/D4
■雑魚フェーズ(倒す順:ジャバ>キャット>フェザー>ムー>ヤーン)※リキャバースト
wave1:MTムー ST+近接ヤーン(リキャバーストで処理) 遠隔キャット ヤーンの場所に遠隔ヒラ集合
wave2:D側フェザーD3 B側フェザーH2 北から捨てる MTムーを東→西フェザーへ誘導 他全員で範囲焼き
wave3:ジャバ+ムー行進(スタン:MT→D1→D2) STヤーン北東待機 バインドヒラ南東
wave4:MTムーC STヤーンA(スタン:ST→D1→D2) D側フェザーD3 B側フェザーD4 南側から捨てる MTムーを東→西フェザーへ誘導
■山川          ■雷雲
火:内側MTH1D1D2      雷雲見て
  外側STH2D3D4  TH←左 他 右→DPS
雷:基本散会
■マグマ          ■塔2回目
H1D3 北 H2D4   4・2・2の場合:近接4人基準時計or反時計
※※※※※※※※※※  中央見て左←【D1MTSTD2】【D3H1】【D4H2】→右
   MT  ST          ▼南8塔の場合
   D1  D2        H2 D3 D4
頭割り:H誘導      H1 D1  MT  ST  D2
Alternatively, you can also reference this cheatsheet:

Markers
The markers are just for orientation.
XIVLauncher WaymarkPresetPlugin positions
{
  "Name":"M6S",
  "MapID":1022,
  "A":{"X":100.0,"Y":0.0,"Z":91.375,"ID":0,"Active":true},
  "B":{"X":108.625,"Y":0.0,"Z":100.0,"ID":1,"Active":true},
  "C":{"X":100.0,"Y":0.0,"Z":108.625,"ID":2,"Active":true},
  "D":{"X":91.375,"Y":0.0,"Z":100.0,"ID":3,"Active":true},
  "One":{"X":91.375,"Y":0.0,"Z":91.375,"ID":4,"Active":true},
  "Two":{"X":108.625,"Y":0.0,"Z":91.375,"ID":5,"Active":true},
  "Three":{"X":108.625,"Y":0.0,"Z":108.625,"ID":6,"Active":true},
  "Four":{"X":91.375,"Y":0.0,"Z":108.625,"ID":7,"Active":true}
}
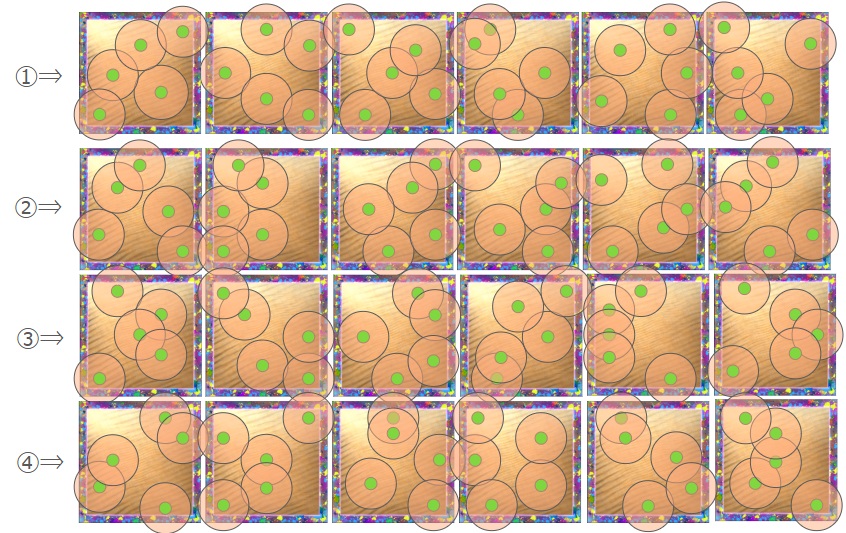
Desert Cactus
There are only 4 patterns in which the cacti can spawn during the Desert phase, with 6 waves each:
 (Credit: X: @stomp0920)
Timeline
 (Credit: u/ExiaKuromonji)
Frequently Asked Questions
[Limit Break] When should I LB to hit the adds before the Gimme Cat takes the LB gauge away?
| Sugar Riot will summon puddings that pulse five times before transforming into the respective adds. Start the LB after the fourth pulse. |