AAC Heavyweight M4 (Savage) - Part 1
Game 8 has gone along with Nukemaru’s guide, which in turn is largely based off Idyllshire’s strategy.
(English subtitled)
English
■ Mortal Slayer ーーーーーーーーーーーーーーーー
 West:MT-group East:ST-group
 Green:H → M → R → Swapped R
 Purple:T → Swapped T
■ Grotesquerie: Act 1 ーーーーーーーーーーーーー
【Stacks in corner】Face cones outside
 H1STMT | MTSTH1 Ⅱ D3D2D1|D1D2D3
 H2   |   H2 Ⅱ D4   |   D4
【Spreads】
   N:MT/D1 > ST/D2 > H1/D3 > H2/D4:S
【Stack + Tankbusters】
 Original safe side:Healers + DPS
 Opposite side:MT North, ST South
■ Grotesquerie: Act 2 ーーーーーーーーーーーーー
  Tethers:1234   Towers:3412
■ Grotesquerie: Act 3 ーーーーーーーーーーーーー
【N/S platforms】【All other platforms】
  ⅡDPS □Ⅱ     Ⅱ□ DPSⅡ
  Ⅱ□ T/HⅡ      ⅡT/H □Ⅱ
【Tankbuster】|【Spread】 MT   ST
 MT:West   |     ★  D1   HH   D2  ★
 ST:East    |        D3   D4
■ Grotesquerie: Curtain Call ーーーーーーーーーー
 Drop AoEs from top-left, follow the edge
【Tethers】Gather mid → T/H: West, DPS: East
   N:MT/D1 > ST/D2 > H1/D3 > H2/D4:S
■ Slaughtershed ーーーーーーーーーーーーーーーー
【Preposition】TH → A  DPS → Mid
【Spread】 H1 MT | MT H1  D3 D1 | D1 D3
      H2 ST   | ST  H2  D4 D2 | D2 D4
Japanese
■リーサルスカージ D側:MT組 B側:ST組
H→近→遠→調整役 T/遠調整 (紫T)
■細胞付着:前期 左前タゲサ端で散開
〈頭割り:角〉扇外周
 H1STMT | MTSTH1 Ⅱ D3D2D1|D1D2D3
 H2   |   H2 Ⅱ D4   |   D4
〈前期散開/周期散開/線切〉
  北から MT/D1 > ST/D2 > H1/D3 > H2/D4
〈最後〉元安置HD 反対北MT南STでタン強
■細胞付着:中期 線取り:1234
         塔踏み:3412
■細胞付着:後期 細胞中央向け
〈X字〉 DPS右上  TH左下
〈十字〉東西:DPS右上TH左下  南北:DPS左上TH右下
〈タン強〉無敵前捨て:D側MT B側ST
〈散開〉T   T
  ★  D1  HH  D2  ★
     D3    D4
■細胞付着:終期 AoE左上から外周沿い捨て
線:中央集合→TH:西、D:東
■スロッターシェッド 詠唱中集合:TH:A DPS:タゲサ先
散会組:H1 MT | MT H1 D3 D1 | D1 D3
    H2 ST   | ST  H2 D4 D2 | D2 D4
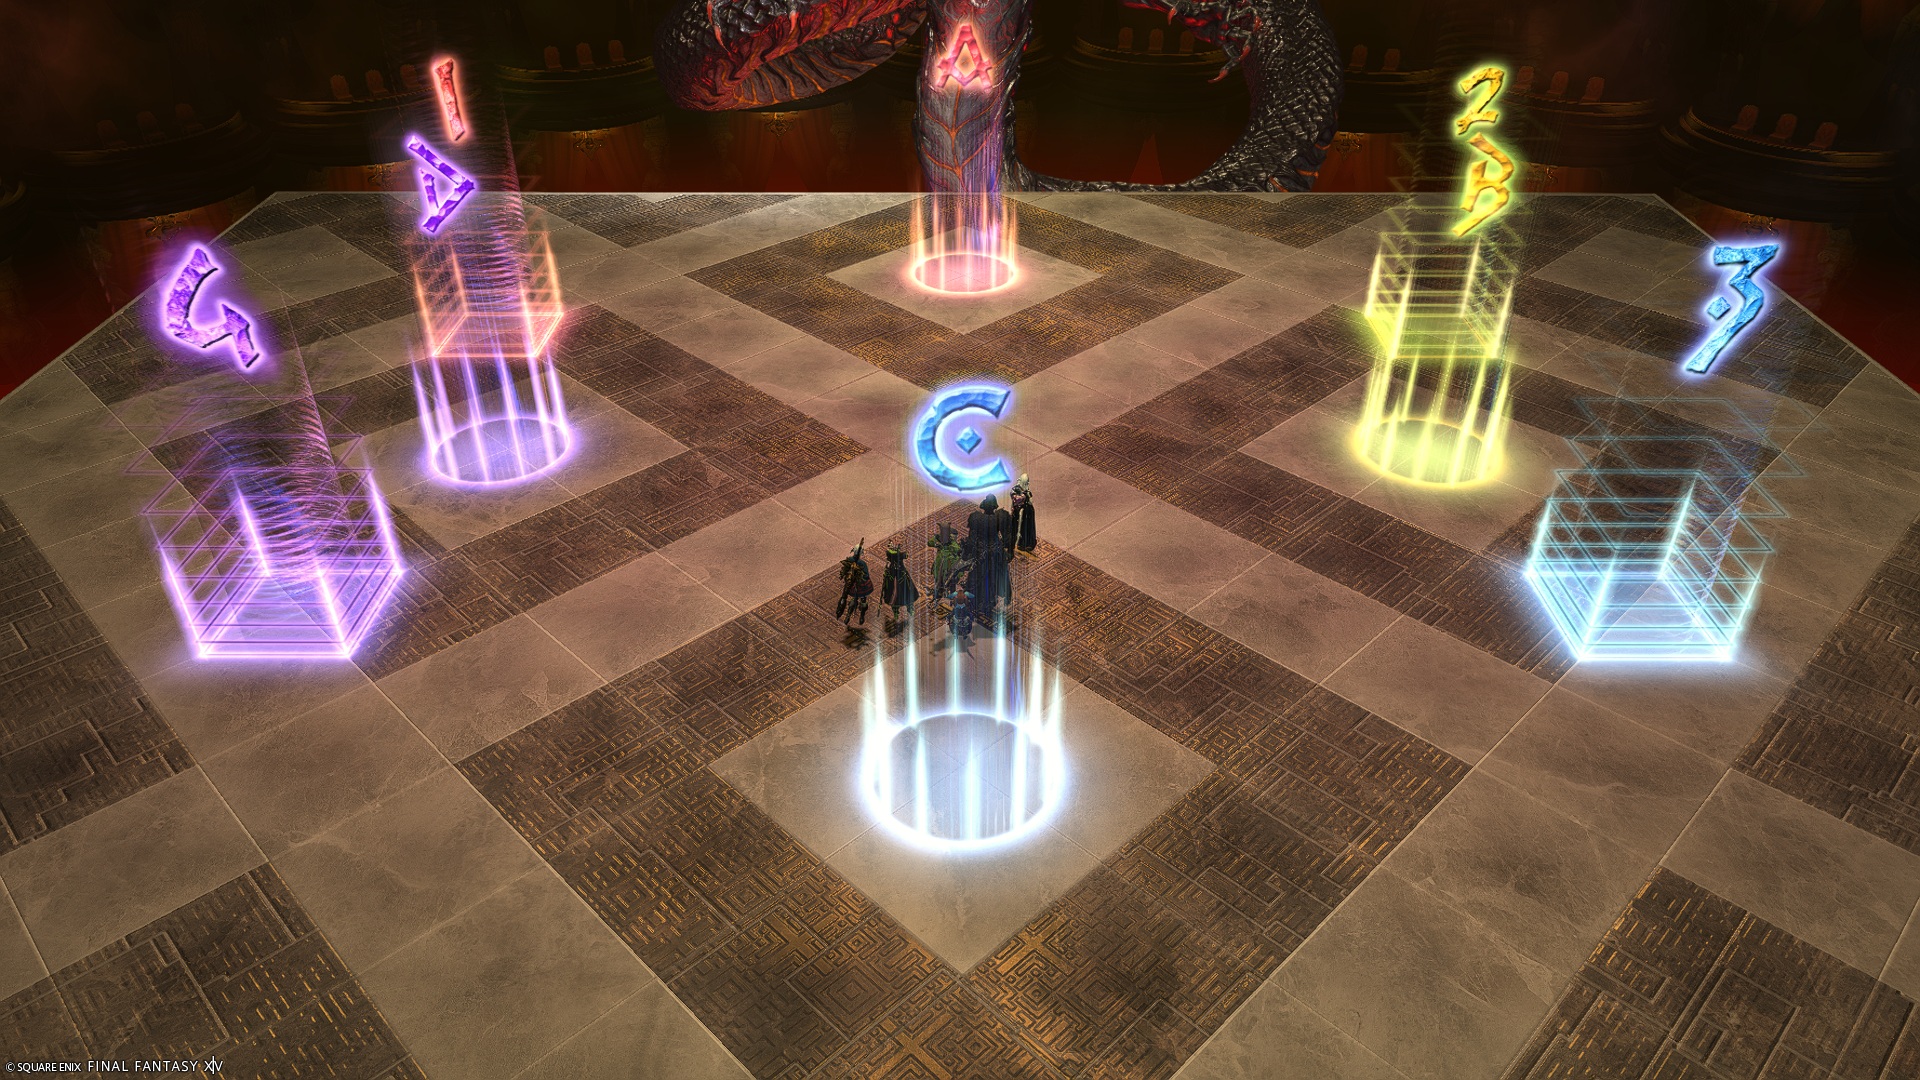
Markers
The ABCD markers are where the β players can stretch their tethers up to in Grotesquerie: Act 2 without running into the boss.
XIVLauncher WaymarkPresetPlugin positions
{
  "Name":"M12S-1",
  "MapID":1075,
  "A":{"X":100.0,"Y":0.0,"Z":91.0,"ID":0,"Active":true},
  "B":{"X":109.0,"Y":0.0,"Z":100.0,"ID":1,"Active":true},
  "C":{"X":100.0,"Y":0.0,"Z":109.0,"ID":2,"Active":true},
  "D":{"X":91.0,"Y":0.0,"Z":100.0,"ID":3,"Active":true},
  "One":{"X":89.4,"Y":0.0,"Z":94.7,"ID":4,"Active":true},
  "Two":{"X":110.6,"Y":0.0,"Z":94.7,"ID":5,"Active":true},
  "Three":{"X":110.6,"Y":0.0,"Z":105.3,"ID":6,"Active":true},
  "Four":{"X":89.4,"Y":0.0,"Z":105.3,"ID":7,"Active":true}
}
Timeline
 (Credit: u/ExiaKuromonji)