The Windward Wilds (Extreme)
Game8 has gone with Nukemaru’s guide.
(English subtitled)
English
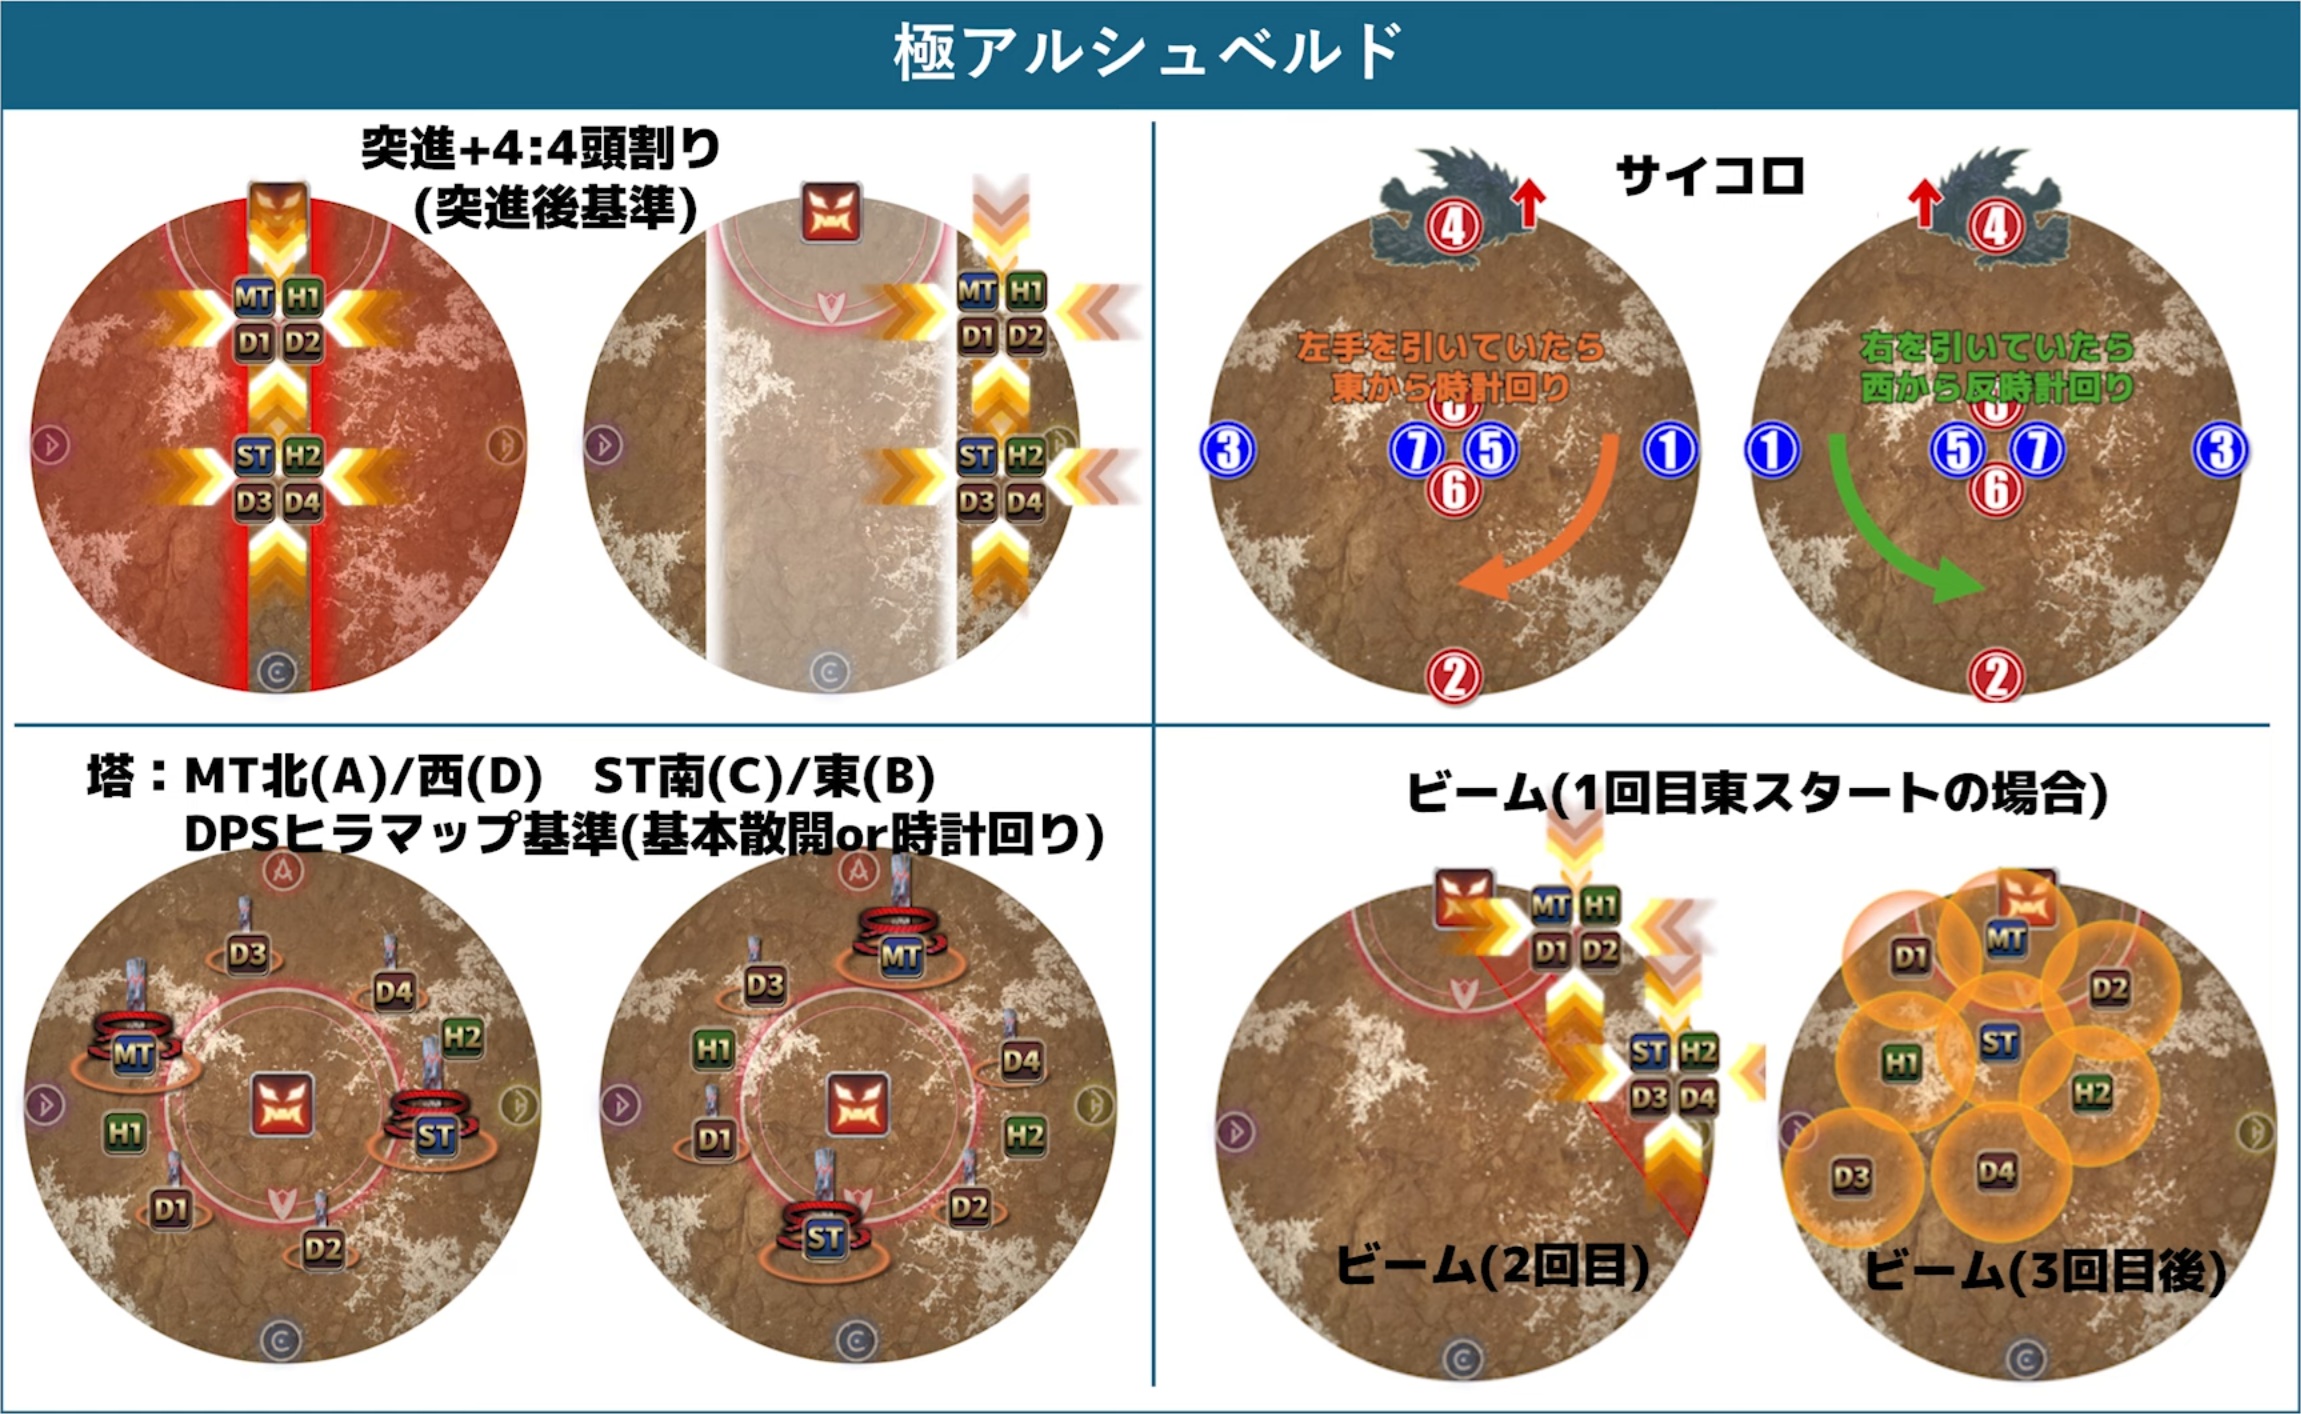
■ 4:4 (Boss-relative after dash)
 N/NE:MTH1D1D2  mid/E:STH2D3D4
■ Towers (True North)
 D3 MT D4  ※ May need to adjust
 MT  ST     slightly CW
 D1 ST D2   ※ Healers are backup
■ Clamorous Chase (Limit Cut)
 West Arm Up (CCW)  East Arm Up (CW)
     4           4
     ↑           ↑
 1← (Others) →3    3← (Others) →1
     ↓           ↓
     2           2
(1/5, 2/6, 3/7, 4/8 swap after hit)
■ Beam bait:E → W → E
Japanese
■頭割り (突進後ボス基準)
 北MTH1D1D2 南STH2D3D4 ※突進前ボス見て左側に寄る
■塔 (タンク以外マップ基準)
 D3 MT D4  T:MT北/西 ST南/東
 MT  ST   D:基本散開か基本散開から時計回り
 D1 ST D2   H:Dのフォロー
■サイコロ
 右手引き(反時計) 左手引き(時計)
      4        4
    ↑          ↑
 1← 他 →3  3← 他 →1
    ↓       ↓
    2        2
(1/5、2/6、3/7、4/8受けたら交代)
■ビーム捨て:東 → 西 → 東
You can also reference this cheatsheet.
Markers
The ABCD markers are used for Clamorous Chase.
XIVLauncher WaymarkPresetPlugin positions
{
  "Name":"Arkveld EX",
  "MapID":1044,
  "A":{"X":100.0,"Y":0.0,"Z":81.4,"ID":0,"Active":true},
  "B":{"X":118.6,"Y":0.0,"Z":100.0,"ID":1,"Active":true},
  "C":{"X":100.0,"Y":0.0,"Z":118.6,"ID":2,"Active":true},
  "D":{"X":81.4,"Y":0.0,"Z":100.0,"ID":3,"Active":true},
  "One":{"X":0.0,"Y":0.0,"Z":0.0,"ID":4,"Active":false},
  "Two":{"X":0.0,"Y":0.0,"Z":0.0,"ID":5,"Active":false},
  "Three":{"X":0.0,"Y":0.0,"Z":0.0,"ID":6,"Active":false},
  "Four":{"X":0.0,"Y":0.0,"Z":0.0,"ID":7,"Active":false}
}
Clamorous Chase (a.k.a. Limit Cut)
極護竜サイコロ 1234が終わったら、5678と入れ替え pic.twitter.com/mduqKOa5PD
— 攻略見る趣味 (@mitsurugi137) October 7, 2025